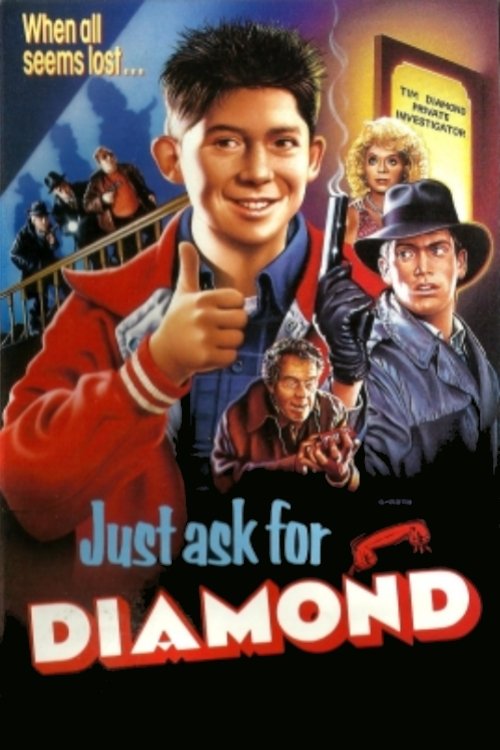
Just Ask for Diamond
Thirteen-year-old Nick and his slightly dense older brother Herbert run the Diamond Private Detective Agency above Camden Town Tube Station in north-central London. When a master criminal called The Falcon dies, they come into possession of his box of chocolate Maltesers, which contains the secret key to a fabulous cache of diamonds. Can they unravel the mystery and avoid the clutches of seedy lowlifes Brenda Von Falkenberg, Gott and Himmell, The Fat Man and the dogmatic Chief Inspector Snape, all of whom want to find the swag first.
Just Ask for Diamond
September 1, 1988
3
ratings
0
reviews
0
video reviews
Cast (34)

Colin Dale
Nick Diamond

Dursley McLinden
Tim Diamond

Susannah York
Lauren Bacardi

Saeed Jaffrey
Mr. Patel

Patricia Hodge
Betty Charlady/Brenda von Falkenberg

Jimmy Nail
Boyle
Roy Kinnear
Jack Splendide

Bill Paterson
Chief Inspector Snape

Michael Robbins
The Fat Man

Peter Eyre
Gott

Nickolas Grace
Himmell

Michael Medwin
The Professor
Forbes Collins
Henry von Falkenberg
José René Ruiz
Johnny Naples (as Rene Ruiz)
Donald Standen
Lawrence

Jim McManus
Hammett

Robert Bathurst
Vicar
Jonathan Linsley
Bouncer
R.J. Bell
Club Owner

Jenny Tomasin
Traffic Warden
Joanna Dickens
Large Woman
Alison Ruffelle
Sales Girl
Auriol Goldingham
Sales Girl
Cristina Avery
Perturbed Mother
Charles Simon
Grandfather

Geraldine Muir
Granddaughter

Gerald Campion
Uncle Holly
Ricky Diamond
Harpoon Salesman
Mammoth
Fat Man's Henchman
John McCoy
Fatman's Henchman
Malcolm Baker
Fatman's Henchman
Nicky Moore
Fatman's Henchman
Vinnie Reed
Fatman's Hnechman
Mark White
Dog Walker
Crew (10)
Directing
Stephen Bayly
Director
Writing

Anthony Horowitz
Writer
Production

Ros Hubbard
Casting
Linda James
Producer
Sound

Trevor Jones
Original Music Composer
Art
Peter Murton
Production Design
Cliff Robinson
Art Direction
Camera

Billy Williams
Director of Photography
Costume & Make-Up
Maria Price
Costume Design
Crew
No data availableEditing
Scott Thomas
Editor